

A bit of Background
I have been reading a lot about autoupgrade. I see lots of oracle technologists talking about it on their blogs and videos and they recommend it. Having got tired of watching from the sidelines, wondering what all the fuzz is about and also due to my own enormous FOMO, I decided to give it a try myself.
So in this post I will explore the autoupgrade utility by attempting to patch an oracle 26ai database from version 23.26.1.0 to 23.26.2.0.0 so I can enjoy all the cool new features in that Release like :
to name a few.
So, Let’s Patch!
Download and setup of oracle autoupgrade
I followed the steps in this post from oracle_base to download and install the autoupgrade utility. I also did some reading up on the feature from the oracle documentation. My database is running on oracle linux 8.10 on oracle virtual box and my sid is orcl.

Step 1 : Install open jdk 11 if you do not have it
Sudo dnf install -y java-11-openjdk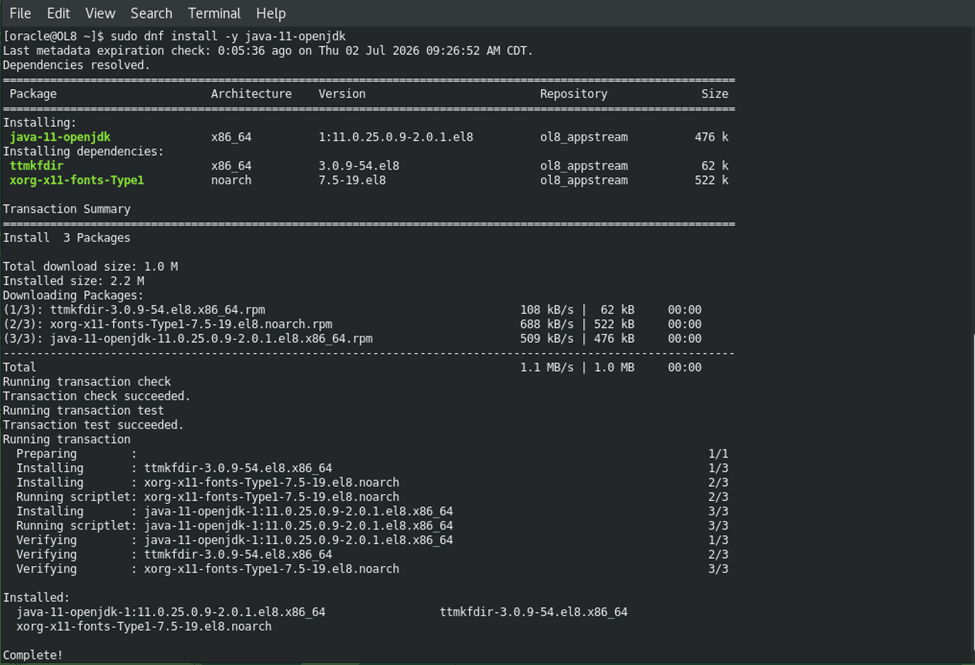
Step 2: Create a Directory to hold Autoupgrade software and download the latest version
This can be done using the below commands:
sudo mkdir -p /u01/autoupgrade
cd /u01
sudo chown oracle:dba autoupgrade/
sudo chmod 775 autoupgrade/
cd /u01/autoupgrade
wget https://download.oracle.com/otn-pub/otn_software/autoupgrade.jar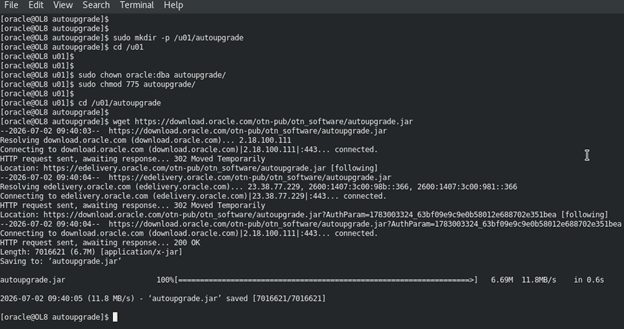
Step 3: Create a Directory to hold the keystore and create a config file to allow us to generate a new keystore.
mkdir keystore
cat > keystore.cfg <<EOF
global.global_log_dir=/u01/autoupgrade/logs
global.keystore=/u01/autoupgrade/keystore
EOF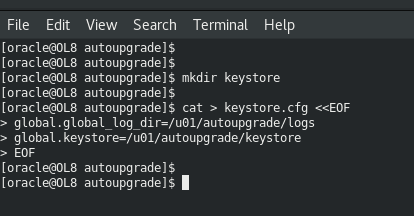
Step 4: Create a new keystore using autoupgrade
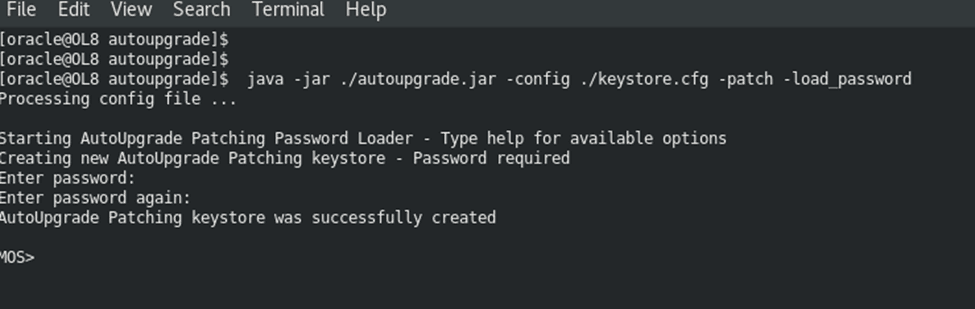
$ java -jar ./autoupgrade.jar -config ./keystore.cfg -patch -load_password
Processing config file ...
Starting AutoUpgrade Patching Password Loader - Type help for available options
Creating new AutoUpgrade Patching keystore - Password required
Enter password:
Enter password again:
AutoUpgrade Patching keystore was successfully created
MOS>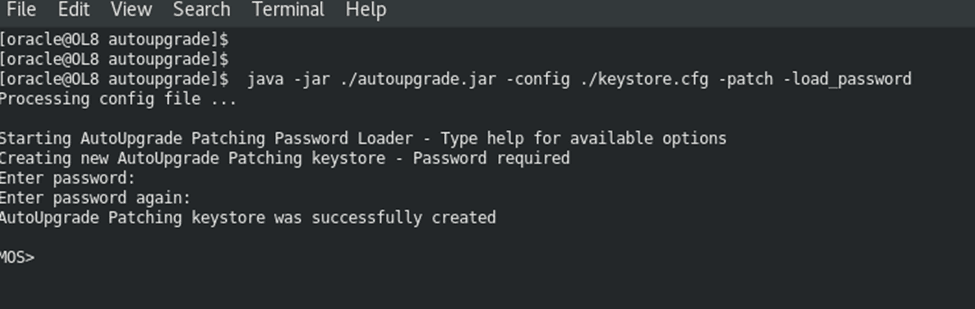
We add our user to the keystore. This is the MOS username and password.
MOS> add -user me@example.com
Enter your secret/Password:
Re-enter your secret/Password:
MOS>
Exit and save the keystore password, converting it to autologin
MOS> exit
Save the AutoUpgrade Patching keystore before exiting [YES|NO] ? YES
Convert the AutoUpgrade Patching keystore to auto-login [YES|NO] ? YES
AutoUpgrade Patching Password Loader finished - Exiting AutoUpgrade Patching
$
Doing a list on my keystore directory

Download oracle software using autoupgrade
Step 1: Setup directories
sudo mkdir -p /u01/software
sudo mkdir -p /u02/app/oracle/product/26.0.0/db_home1
sudo chmod -R 775 app/oracle/product/26.0.0/db_home1/
sudo chown oracle:dba app/oracle/product/26.0.0/db_home1

cd /u01
sudo chown oracle:dba software
sudo chmod 775 software
Step 2: create config file
cd /u01/autoupgrade
vi oracle26.cfg
add contents:
global.global_log_dir=/u01/autoupgrade/logs
global.keystore=/u01/autoupgrade/keystore
#install1.patch=RU,OPATCH,OJVM,DPBP,AU
install1.patch=RECOMMENDED
install1.folder=/u01/software
install1.target_home=/u02/app/oracle/product/26.0.0/db_home1
install1.home_settings.oracle_base=/u01/app/oracle
install1.home_settings.edition=EE
install1.home_settings.inventory_location=/u01/app/oraInventory
install1.target_version=26
install1.download=yes
~
Step 3: download latest RU using autoupgrade
java -jar autoupgrade.jar -config oracle26.cfg -patch -mode download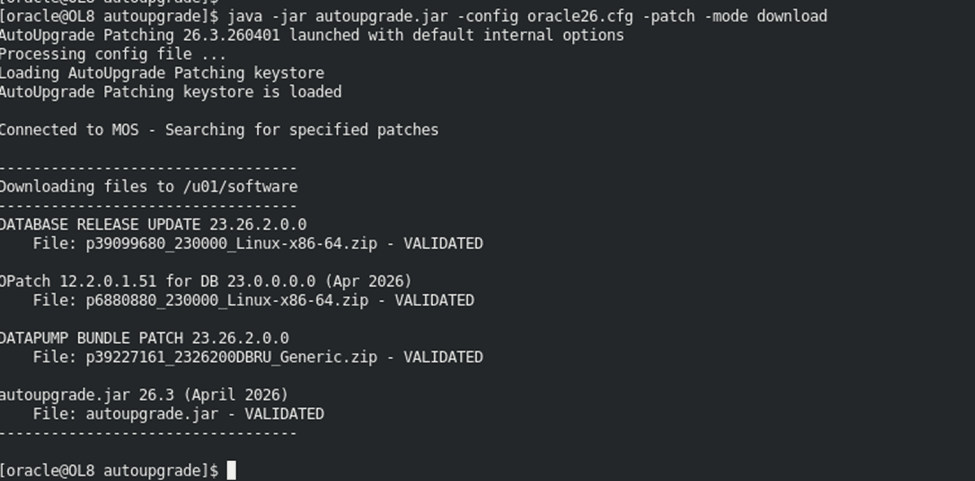
We can verify the software download:
ls -al /u01/software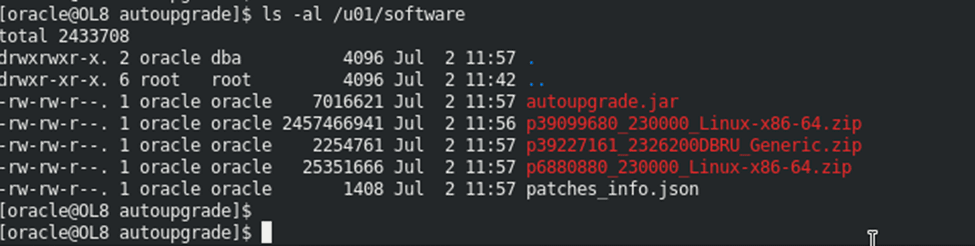
Create Patched ORACLE_HOME
Autoupgrade by default does out-of-place patching i.e creating a copy of oracle home, applying patches to the copied home, and then switching services to the copied home.
The below command installs a new Oracle Home.
java -jar autoupgrade.jar -config oracle26.cfg -patch -mode create_home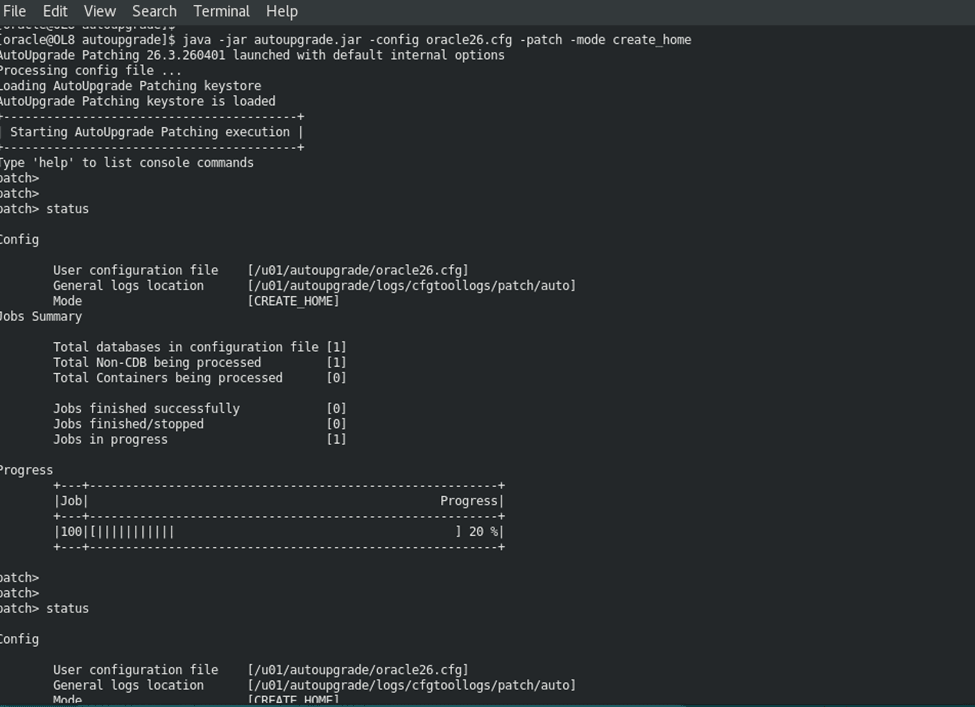

Patch Database
This is as far as the post from oracle base goes so from here on out I was on my own. I’d seen from this video, that it is possible to apply the datapatch and move the database over to the new home using autoupgrade, so I decided to give it a try myself.
First, I added 2 more lines to my config file.
install1.source_home=/u01/app/oracle/product/23.26.0.0/dbhome_1
install1.sid=orcl
And then I run the command
java -jar autoupgrade.jar -config oracle26.cfg -patch -mode analyzebut I kept getting the error :
*Validating Oracle Patch files
An Oracle newer Release Update file for database is not found in /u01/software for the job with prefix install1
and thanks to this response from oracle forums, I was able to get around it:
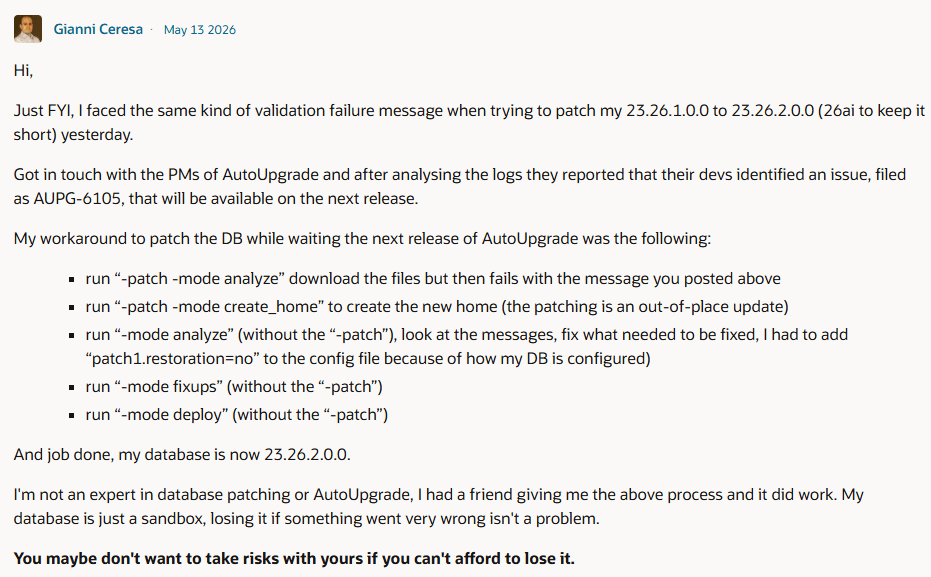
So I create a new config file called patch26.cfg with the following contents
global.global_log_dir=/u01/autoupgrade/logs
global.keystore=/u01/autoupgrade/keystore
global.folder=/u01/autoupgrade
#install1.patch=RU,OPATCH,OJVM,DPBP,AU
install1.folder=/u01/software
install1.platform=LINUX.X64
install1.target_home=/u02/app/oracle/product/26.0.0/db_home1
install1.source_home=/u01/app/oracle/product/23.26.0.0/dbhome_1
install1.patch=RECOMMENDED
install1.sid=orcl
install1.restoration=no
and I ran
java -jar autoupgrade.jar -config patch26.cfg -mode analyzeI got a Message saying these two parameters are not needed:

However when I check my logfile at the end all looked good.
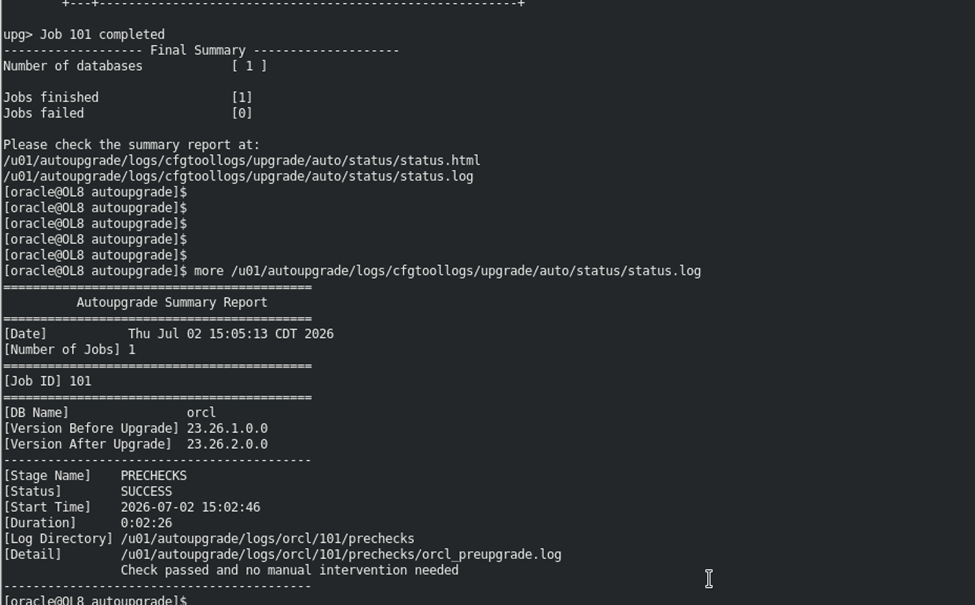
I then ran autoupgrade again in deploy mode, without the -patch option.
java -jar autoupgrade.jar -config patch26.cfg -mode deploy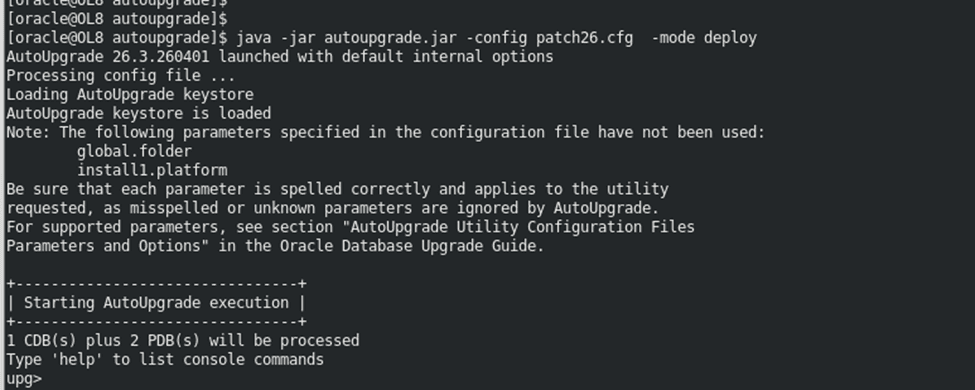
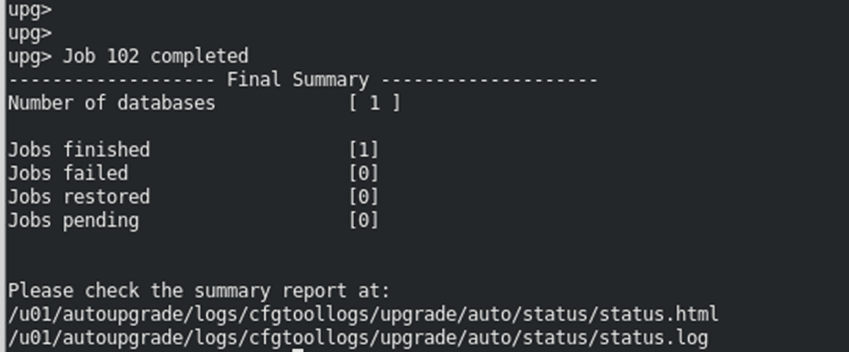
I periodically monitored the status using :
status  #To get a summary showing the number of databases, succeeded jobs, aborted jobs, and progress.
lsj     #see the current list of jobs, their corresponding JOBID, target database DB_NAME and percentage of completion
tasks   #view the individual background operations that make up a specific upgrade job
At the end, My logfile looked like this:
[oracle@OL8 autoupgrade]$ more /u01/autoupgrade/logs/cfgtoollogs/upgrade/auto/status/status.log
==========================================
          Autoupgrade Summary Report
==========================================
[Date]           Thu Jul 02 15:49:33 CDT 2026
[Number of Jobs] 1
==========================================
[Job ID] 102
==========================================
[DB Name]                orcl
[Version Before Upgrade] 23.26.1.0.0
[Version After Upgrade]  23.26.2.0.0
------------------------------------------
[Stage Name]    PREUPGRADE
[Status]        SUCCESS
[Start Time]    2026-07-02 15:08:44
[Duration]      0:00:00
[Log Directory] /u01/autoupgrade/logs/orcl/102/preupgrade
------------------------------------------
[Stage Name]    PRECHECKS
[Status]        SUCCESS
[Start Time]    2026-07-02 15:08:44
[Duration]      0:02:19
[Log Directory] /u01/autoupgrade/logs/orcl/102/prechecks
[Detail]        /u01/autoupgrade/logs/orcl/102/prechecks/orcl_preupgrade.log
                Check passed and no manual intervention needed
------------------------------------------
[Stage Name]    PREFIXUPS
[Status]        SUCCESS
[Start Time]    2026-07-02 15:11:04
[Duration]      0:07:39
[Log Directory] /u01/autoupgrade/logs/orcl/102/prefixups
[Detail]        /u01/autoupgrade/logs/orcl/102/prefixups/prefixups.html
------------------------------------------
[Stage Name]    DRAIN
[Status]        SUCCESS
[Start Time]    2026-07-02 15:18:43
[Duration]      0:00:23
[Log Directory] /u01/autoupgrade/logs/orcl/102/drain
------------------------------------------
[Stage Name]    DBUPGRADE
[Status]        SUCCESS
[Start Time]    2026-07-02 15:19:06
[Duration]      0:25:51
[Log Directory] /u01/autoupgrade/logs/orcl/102/dbupgrade
------------------------------------------
[Stage Name]    POSTCHECKS
[Status]        SUCCESS
[Start Time]    2026-07-02 15:44:57
[Duration]      0:00:10
[Log Directory] /u01/autoupgrade/logs/orcl/102/postchecks
[Detail]        /u01/autoupgrade/logs/orcl/102/postchecks/orcl_postupgrade.log
                Check passed and no manual intervention needed
------------------------------------------
[Stage Name]    POSTFIXUPS
[Status]        SUCCESS
[Start Time]    2026-07-02 15:45:08
[Duration]      0:04:09
[Log Directory] /u01/autoupgrade/logs/orcl/102/postfixups
[Detail]        /u01/autoupgrade/logs/orcl/102/postfixups/postfixups.html
------------------------------------------
[Stage Name]    POSTUPGRADE
[Status]        SUCCESS
[Start Time]    2026-07-02 15:49:17
[Duration]      0:00:00
[Log Directory] /u01/autoupgrade/logs/orcl/102/postupgrade
------------------------------------------
[Stage Name]    SYSUPDATES
[Status]        SUCCESS
[Start Time]    2026-07-02 15:49:18
[Duration]      0:00:15
[Log Directory] /u01/autoupgrade/logs/orcl/102/sysupdates
------------------------------------------
Summary:/u01/autoupgrade/logs/orcl/102/dbupgrade/datapatch_summary.log
Post Patch Checks
One of the great things abut autoupgrade is that it takes care of moving files between the oracle homes and pointing all services to the target home. For example :
My oratab was updated:

I set my environment to the new ORACLE_HOME using :
. oraenv
orcl
I then connect to the database and voila:
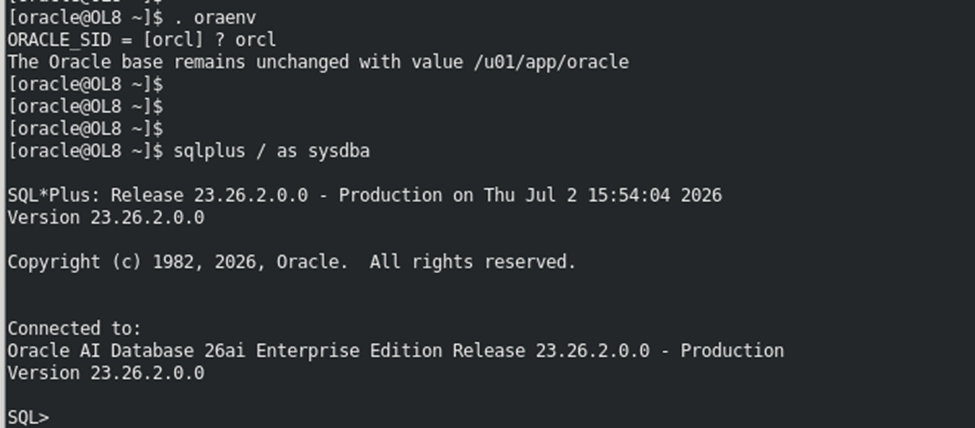
As show above, I am now running on 23.26.2.0.0 with lots of goodies.
Thanks for following along, and hopefully this is helpful for you.
Cheers, Harris.